
How to Brighten a Room with Art for Inspiring Décor
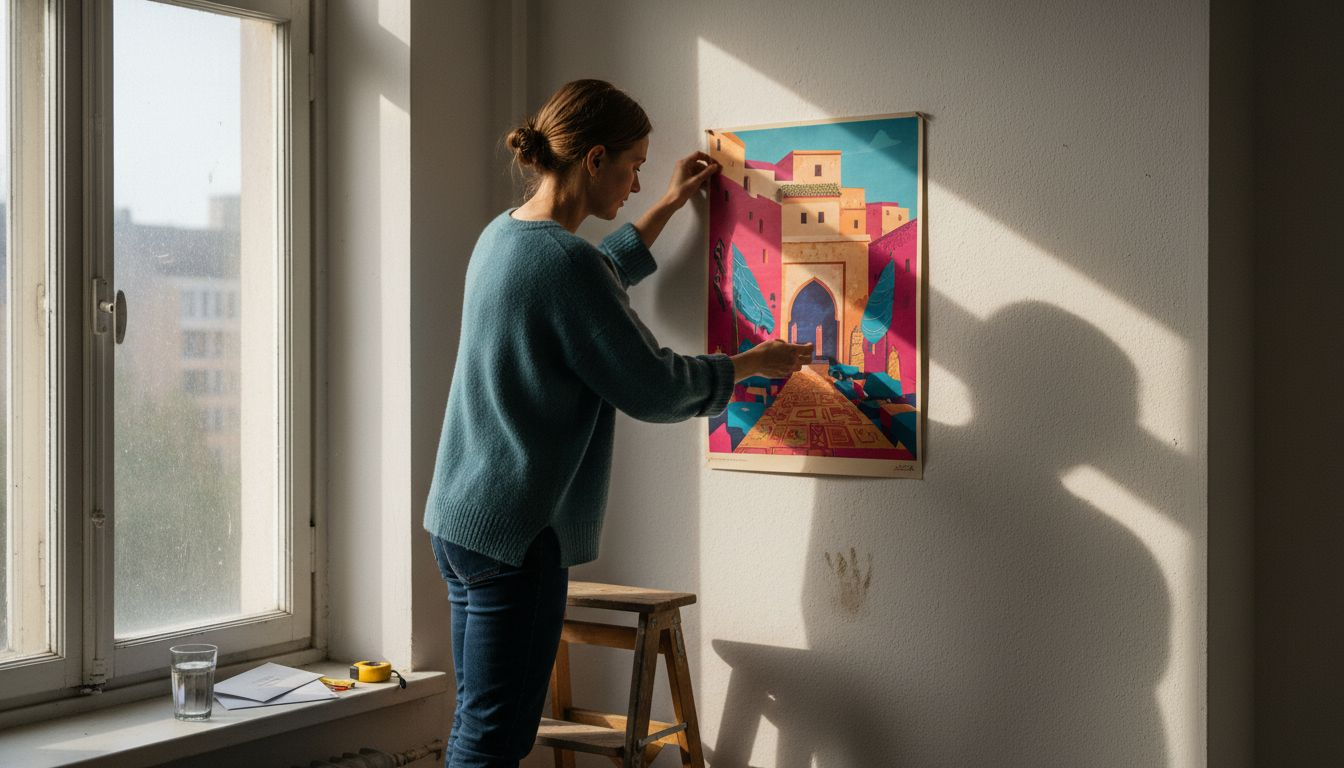
Moving into a new home means every blank wall invites possibility. For many young professionals, creating a space that feels bright, welcoming, and personal is a top priority. Assessing natural lighting is a crucial first step, since sunlight transforms the way art looks and boosts well-being according to architectural design research. This guide offers practical strategies to harness natural light and wall space, helping you showcase vibrant travel-inspired art that energises your room and inspires daily wanderlust.
Table of Contents
- Step 1: Assess Natural Lighting And Wall Space
- Step 2: Select Vibrant Travel-Themed Artwork
- Step 3: Position Art To Maximise Brightness
- Step 4: Check Impact And Adjust Arrangements
Quick Summary
| Key Insight | Explanation |
|---|---|
| 1. Assess natural lighting first | Observing natural light at various times helps determine the best wall space for hanging artwork. Light affects how art is perceived throughout the day. |
| 2. Choose vibrant travel-themed artwork | Select pieces with bold colours and styles that resonate with you, reflecting your personality and mood preferences while energising your space. |
| 3. Position art for maximum brightness | Hang artworks near light sources and avoid direct sun exposure to enhance their visibility and overall room brightness. |
| 4. Regularly check and adjust arrangements | Observe the impact of lighting on artwork over days and seasons, making adjustments to optimise visual harmony and address any glare or shadow issues. |
Step 1: Assess natural lighting and wall space
Before you hang a single piece of art, you need to understand how light moves through your room. Sunlight transforms walls and transforms how your artwork looks throughout the day, so this assessment shapes everything that follows.
Start by observing your space at different times. Spend a morning, afternoon, and evening noting where light enters and how it moves across your walls. Does a window flood one wall with brightness at 10 a.m., then leave it dim by evening? That matters. Your art will look completely different under strong morning light than under soft afternoon glow.
Check your window placement and size relative to wall space. Large windows flood rooms with natural light, whilst smaller windows create pockets of brightness. Architectural design using natural light shows that window position directly affects how daylight spreads across available wall surfaces. A wall opposite a window receives indirect, even light. A wall beside a window gets directional, sometimes harsh light.
Consider your wall colour and material too. Light walls reflect sunshine and create brightness throughout the space. Dark walls absorb light, creating intimacy but potentially making art harder to see. The material matters as well. Matte surfaces scatter light, whilst glossy finishes create glare.
Identify which walls receive consistent light versus which ones stay shadowy:
Here is a quick reference for how window placement and wall orientation affect natural light conditions:
| Wall Orientation | Typical Light Level | Effect on Artwork |
|---|---|---|
| North-facing | Consistently cool | Colours appear subdued |
| South-facing | Bright, warm | Enhances vibrancy |
| East-facing | Bright in morning | Gentle illumination early |
| West-facing | Bright in evening | Strong golden glow later |
- North-facing walls stay cool and shadowy year-round
- South-facing walls (in the Northern Hemisphere) receive strong, warm light
- East walls get bright morning light that softens by afternoon
- West walls experience intense afternoon and evening sun
Measure your available wall space honestly. How much unobstructed wall do you actually have? Factor in furniture placement, doorways, and shelving. Your travel art needs breathing room, not cramped corners.
Think about glare, too. Direct sunlight on glass-fronted frames creates reflections that wash out colours. If you have a particularly sunny wall, you might want unglassed art or frames with anti-reflective glass.
Light assessment determines not just where your art goes, but how viewers will experience it every single day.
Pro tip: Take photos of each wall at morning, midday, and evening. Comparing these images later reveals exactly which walls stay well-lit throughout the day, helping you position your most vibrant travel pieces in spots where they truly shine.
Step 2: Select vibrant travel-themed artwork
Now that you understand your light and wall space, it’s time to choose artwork that brightens your room whilst reflecting your wanderlust. The right pieces transform blank walls into windows onto the world.
Start by thinking about colour. Vibrant artwork with bold palettes naturally draws the eye and energises a space. Warm tones like oranges, reds, and golds create inviting atmospheres, whilst cool blues and teals bring calm sophistication. Think about what mood you want in each room. A bedroom might benefit from serene coastal scenes, whilst a lounge could handle more dynamic cityscapes.
Consider the composition and style of your pieces. Dynamic city maps and colourful posters showcase iconic locations whilst adding personality to your walls. Vintage travel posters evoke nostalgia and timeless charm. Photographic prints of landmarks you’ve actually visited create personal connection. Modern minimalist maps appeal to contemporary tastes. Each style tells a different story about who you are.
Size matters more than many people realise. A single small print gets lost on a large wall. A piece that’s too massive overwhelms a compact space. Consider the wall dimensions you assessed earlier. A piece should be roughly 50 to 75 per cent of the width of your furniture or the wall section it anchors.

Use this table to match artwork styles with ideal room settings and moods:
| Artwork Style | Best Room Setting | Mood Created |
|---|---|---|
| Vibrant city maps | Lounge or hallway | Energetic, dynamic |
| Coastal landscape | Bedroom | Calm, soothing |
| Vintage travel posters | Study or office | Nostalgic, charming |
| Minimalist maps | Contemporary area | Modern, uncluttered |
Choose pieces that genuinely speak to you:
- Destinations you’ve travelled to or dream of visiting
- Colour palettes that complement your existing décor
- Styles that feel authentically yours, not just trendy
- Quality printing on materials that last (canvas or premium paper)
- Framing options that suit your aesthetic and budget
Think about how multiple pieces work together. Three smaller prints might create more visual interest than one large piece. A gallery wall mixing different travel destinations builds a narrative of exploration. Ensure there’s visual harmony, though. Wildly clashing colour schemes create chaos rather than brightness.
Your artwork should spark conversation and remind you daily why you chose it.
Pro tip: Start with one statement piece in your brightest, most-observed wall, then add complementary pieces gradually once you see how that first artwork transforms the space and how visitors respond to it.
Step 3: Position art to maximise brightness
Where you hang your art is just as important as what you choose. Strategic positioning transforms a piece from merely decorative into a room-brightening focal point that catches and amplifies light throughout the day.
Start by placing artwork near natural light sources. A painting positioned on a wall adjacent to a window benefits from continuous daylight without direct sun exposure that could fade colours. Light bounces off the artwork and spreads across your room, amplifying overall brightness. This positioning trick costs nothing yet delivers noticeable results.
Consider reflective surfaces nearby. A mirror opposite your artwork bounces light back onto the piece, creating a luminous effect. Lighter coloured walls surrounding your art amplify this reflection further. The combination of natural light, artwork, and reflective surfaces works together to brighten your entire space.
When installing artificial lighting, angle matters significantly. Directional lighting angled at approximately 30 degrees highlights artwork without creating glare or harsh shadows. Adjustable LED track lights give you flexibility to fine-tune angles as seasons change and sunlight patterns shift. Avoid pointing lights straight on, which flattens the artwork and causes reflections on glass frames.
Position art at the right height for visual impact. Hang most pieces with their centre at approximately eye level when standing, roughly 152 to 157 centimetres from the floor. This positioning feels natural and allows viewers to engage fully with your travel scenes.
Keep these placement principles in mind:
- Avoid direct sunlight that fades colours and damages artwork over time
- Position pieces where they’re visible from seating areas and entry points
- Leave adequate wall space around each piece so it stands out
- Use clustering on larger walls rather than scattering single pieces
- Test placement with removable tape before committing to nail holes
Remember that positioning changes throughout the year. Winter sunlight enters at different angles than summer sun. Revisit your artwork placement seasonally to optimise brightness as natural light patterns shift.
Proper positioning makes your art work harder, brightening not just the wall but the entire room.
Pro tip: Use a smartphone camera to photograph your wall from different angles with various lighting conditions. These images reveal exactly which positions catch the most light and how your artwork interacts with natural and artificial illumination throughout the day.
Step 4: Check impact and adjust arrangements
Your setup is complete, but the work isn’t finished yet. Take time to evaluate how your art and lighting actually perform in real conditions, then make adjustments until everything feels right.
Spend at least three days observing your space. Morning light behaves differently from afternoon light, and evening ambiance tells another story entirely. Walk through your room at different times and notice how your artwork appears under each lighting condition. Does it glow? Does it disappear into shadow? Does glare wash out the colours?
Look for common problems that need fixing. Uneven light distribution leaves some artwork bright whilst others fade into darkness. Harsh shadows cast by directional lights can look dramatic but often diminish artwork impact. Glare on glass frames obscures details and frustrates viewers. Light glare and uneven illumination require repositioning lights or art pieces to achieve optimal visual balance.
Pay attention to brightness consistency across your walls. Your eye naturally moves to the brightest areas first. If one artwork gets all the light while others remain dim, visitors will focus disproportionately on that single piece. Adjust lighting angles to distribute brightness more evenly throughout the space.
Make these practical adjustments:
- Reposition lights slightly and observe the difference
- Add or remove diffusers to soften harsh illumination
- Adjust dimmer settings to find the sweet spot for each time of day
- Move artwork slightly higher or lower if shadows fall awkwardly
- Introduce reflective surfaces like lighter cushions or small mirrors if needed
Test changes one at a time so you understand what each adjustment contributes. Moving everything simultaneously creates confusion about what actually improved the space. Document your final arrangements with photos for future reference.
Remember that this isn’t a one-time task. Seasonal light changes, new furniture, and evolving décor preferences all warrant reassessment. Your room should feel fresh and inspiring every time you walk in, not static.
A space that looks perfect in one season might need tweaking when light angles shift with the seasons.
Pro tip: Invite a friend to visit at different times of day and ask for honest feedback on what catches their eye first and how the brightness feels. Fresh perspectives reveal issues you’ve become blind to after staring at your own walls.
Brighten Your Space with Inspiring Travel Art from Studio William
If you have been exploring how to brighten a room with art and want to bring the vibrant spirit of travel into your home our carefully curated collection offers the perfect solution. The article highlights the challenge of selecting artwork that truly complements natural light to energise your space while reflecting your love for adventure. At Studio William you can find premium framed travel posters and uniquely crafted pieces that capture iconic city skylines and tranquil coastal escapes printed on premium paper or canvas.
Discover how our Abstract Framed Canvas Wall Art | Luxury Modern Prints – Studio William and UK Watercolours – Studio William collections can transform your walls into luminous focal points that brighten your rooms during all times of the day. Don’t wait to make your décor reflect your wanderlust and create a constant feeling of inspiration. Visit Studio William now and select statement pieces that enhance your home’s natural light and bring vibrant colour into your everyday life.
Frequently Asked Questions
How can I assess natural lighting in my room for art placement?
Understanding natural lighting is crucial for art placement. Spend time observing your space at different times of the day, noting where light enters and how it moves across your walls. Take photos to compare how your art will be illuminated at various times.
What types of artwork are best for brightening a room?
Vibrant artwork with bold colours naturally draws the eye and energises a space. Choose pieces that reflect your travels and complement the mood you want in each room, such as vibrant city maps for a lounge or calm coastal landscapes for a bedroom.
How should I position art to maximise brightness in my room?
Place artwork near natural light sources, ensuring it benefits from indirect sunlight rather than direct exposure. Position it at eye level, allowing viewers to fully engage with the piece, and keep about 15–20 centimetres of space around it for a more impactful display.
What adjustments can I make if my art appears too dim or overshadowed?
If your artwork looks dim, evaluate the light distribution in the room and reposition lights or the artwork itself. Test moving the artwork slightly higher or lower and altering light angles until you achieve an even brightness across your walls.
How often should I reassess my art and lighting arrangements?
Reassess your art and lighting every couple of months or when seasonal changes occur, such as varying sunlight angles. Regular adjustments will ensure that your room always feels fresh and inspiring, optimising the overall brightness and atmosphere.
Recommended
- Luxury Abstract Framed Canvas Wall Art | Quiet Tides #1 – Studio William
- Gold Leaf Abstract Canvas Art #1 | Modern Luxury Wall Art – Studio William
- Luxury Abstract Framed Canvas Wall Art | Quiet Tides #2 – Studio William
- Gold Leaf Abstract Canvas Art #2 | Modern Luxury Wall Art – Studio William